Racks can be imported as well as newly created. The import of racks is explained here.
Rack Editor
New racks can be created in the editor within a Planning State using the "create new rack" button. The following specifications are possible for the creation of a new rack:
- Rack dimensions
- Properties of the rack
- Shelf levels
- Bays
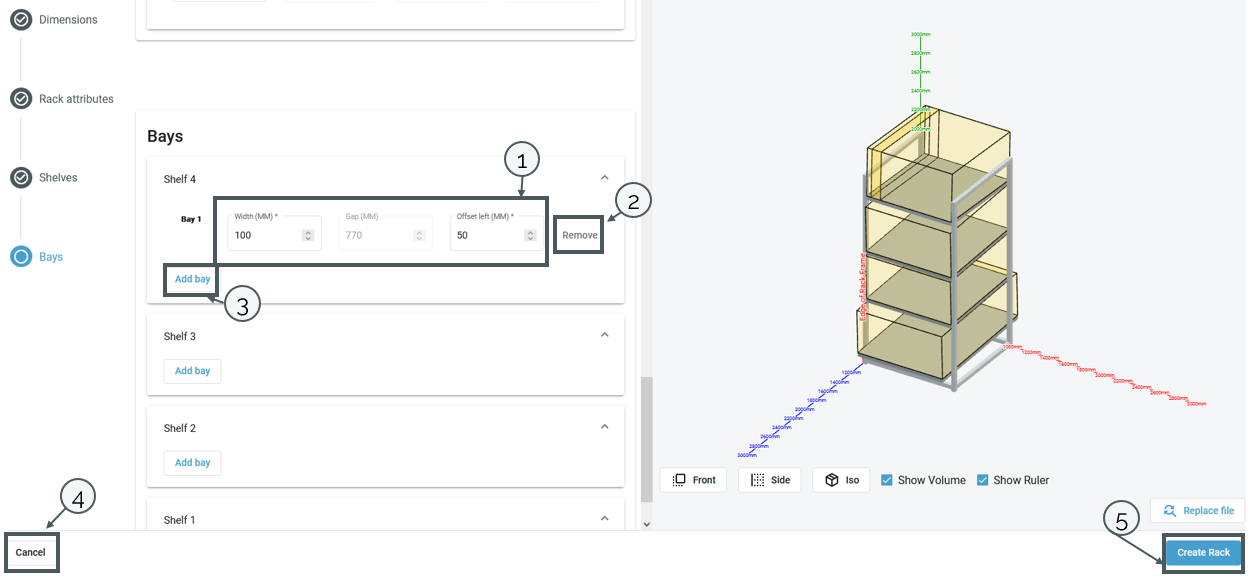
3D view
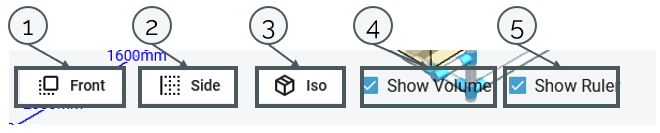
In the 3D view, there are options to select different perspectives of the rack.
Under "Front" the view jumps to the front view, under "Side" to the side view and under "Iso" to the isometric angle (1-3). Under "Show Volume" the volume and under "Show Rule" the axis can be shown or hidden.
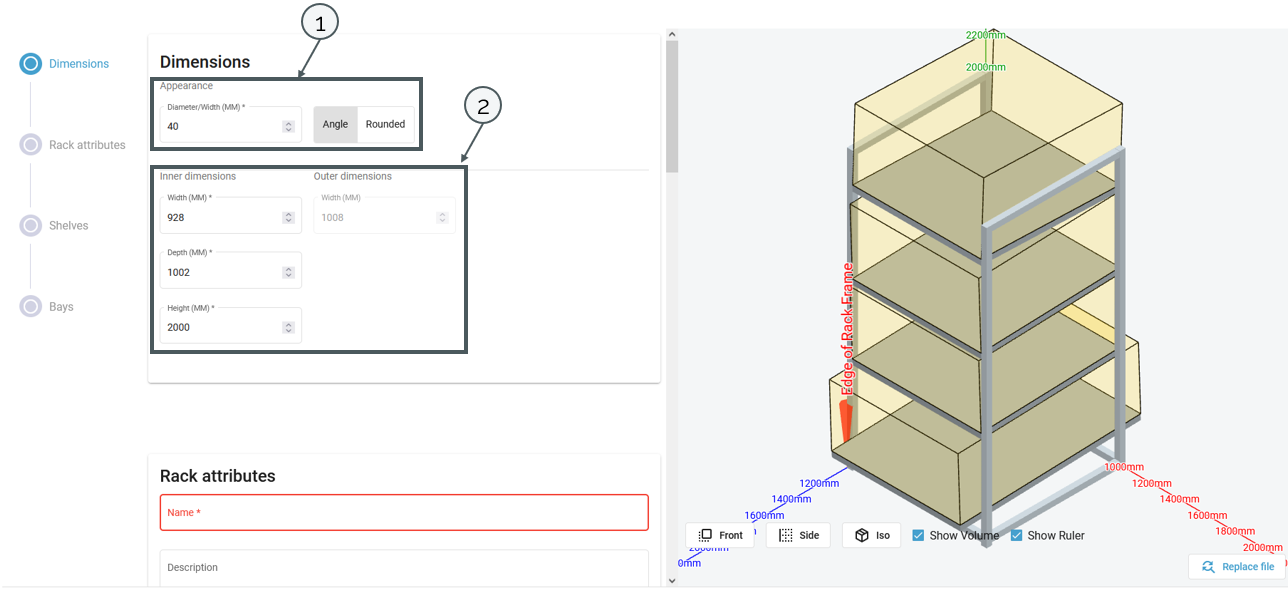
Dimensions
In the "Dimensions", the diameter of the shelf can be specified, as well as the shape of the shelf (1). In addition, the width (inside and outside), depth and height can be specified.
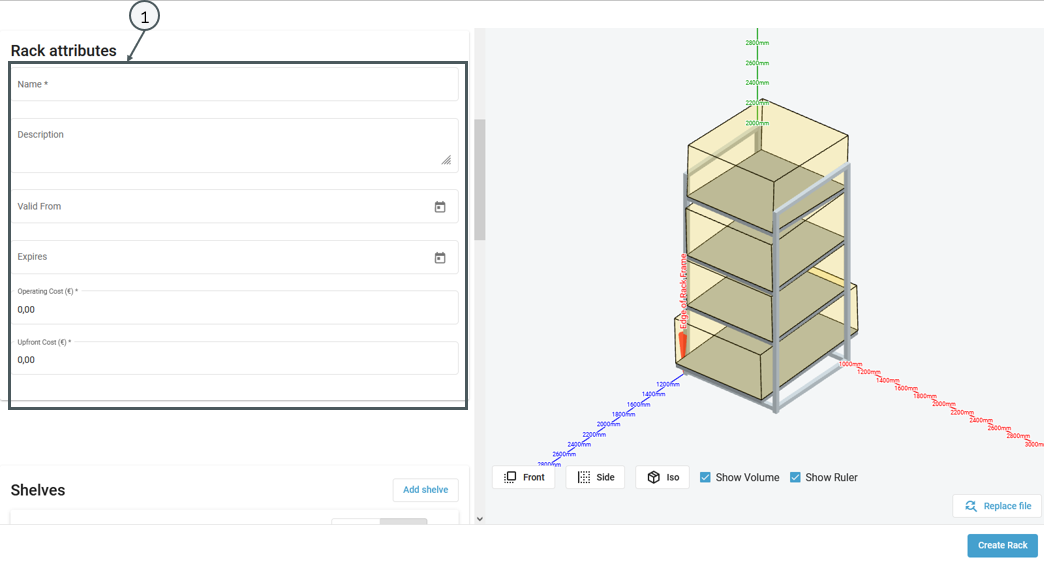
Shelf properties
in the "Rack attributes" the following properties can be defined:
- Name
- Description
- Validity date
- Expiration date
- Operating costs
- Upfront costs
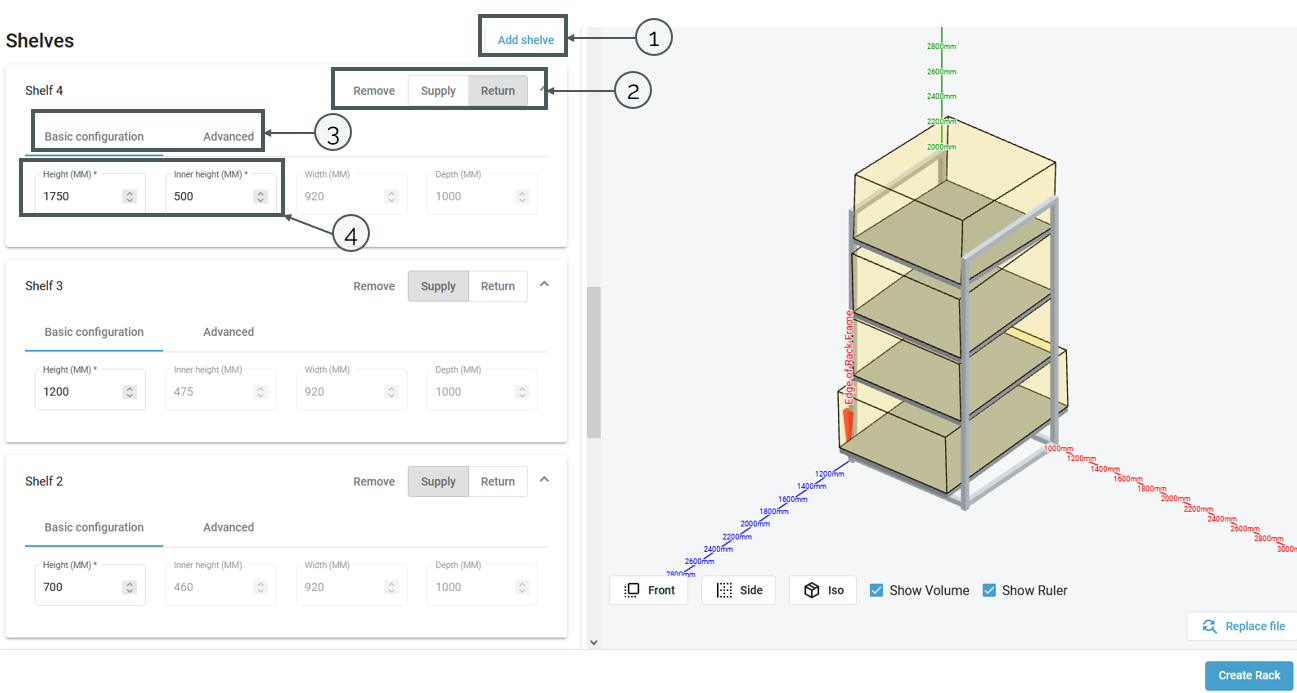
Shelves
Under "Shelves", individual specifications can be made for the shelf levels, counting from top to bottom. Layers can be added via "Add shelve" (1).
A setting that can be made per level is the specification whether it is the supply or the return (2). Furthermore, a distinction can be made between a basic configuration and an extended configuration (3). The basic configuration includes the setting of the height and the inner height. The width and the depth are automatically taken from the dimensions of the shelf (4).
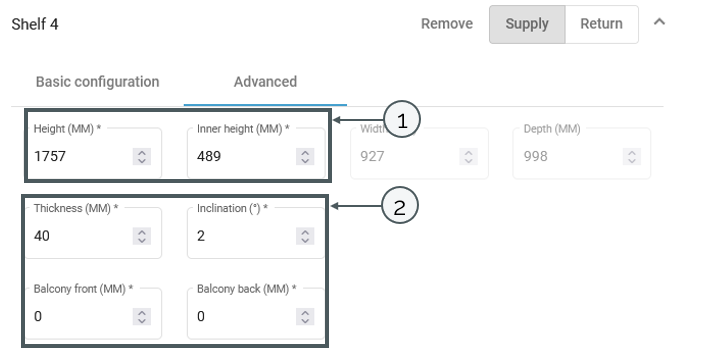
In the advanced configurations it is also possible to specify the height as well as the inner height (1) but also the thickness, the slope and the front and rear balcony(2).
Bays
To change the number of boxes on a layer, a new column can be added under "Add bay" (3). The dimensions "width" and the "offset to the left" can be specified. The gap is calculated automatically for a column. If a new column is added, the gap of the previous column can be entered.
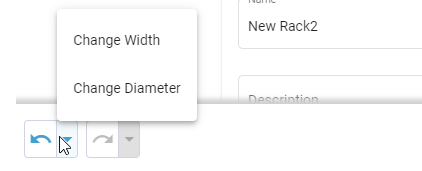
To support you when doing different changes in the rack editor, we have implemented an undo/ redo functionality to go some steps back if you notice you have changed wrong things. This option of going back and forth was is available till you saved or canceled the changes in this view:
Pending changes - Accepting and publishing changes
To adopt imported and/or newly created shelves or changes to shelves in the Planning States, the following procedure must be followed:
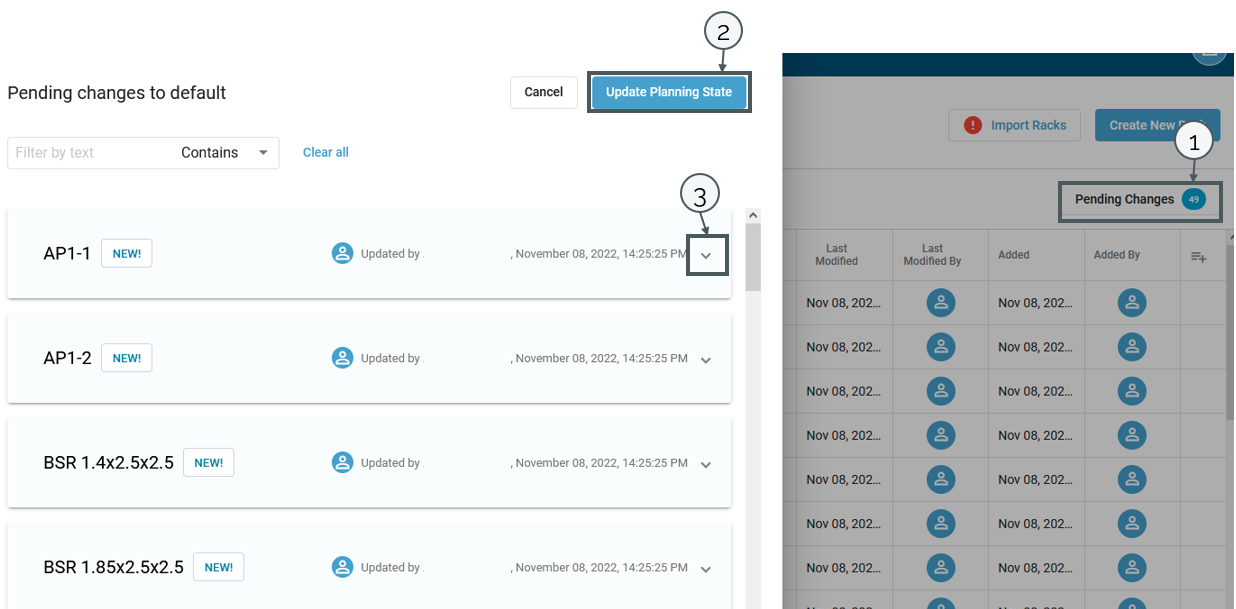
In the overview of the shelves, select the "Pending Changes" button in the upper right corner (1).
A pop-up window appears, which (in the case of the screenshot) shows the properties of the new shelves. If a new shelf is edited, a version comparison between the old and new state of the properties will appear(3).
To release the planning state for use in the planning tasks in the clients, "Update Planning State" must be selected (2).
In the overview, it is possible to see in the column 'Status' in which phase a shelf is. Shelves that have not been published are labeled "Pending", published shelves are given a blue check mark and the status "published".
The use of shelves in a scenario is explained in this article.