The material zone editor in ipolog 4 Workspace allows you to select containers and racks, move and arrange them using drag & drop or buttons:

Functions
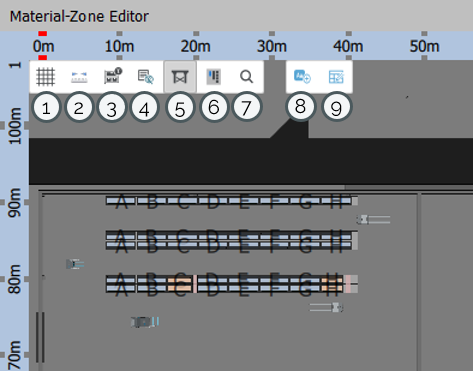
| 1 | Show grid | Shows/hides grid |
| 2 | Enter measure mode | Measure distances. More on that below. |
| 3 | Toggle container information | If "Toggle container information" is activated, the 2D view will show more detailed information about the boxes on the floor, such as part designation, part number and box designation. |
| 4 | Toggle detailed rack / box information | Displays detailed information on racks and boxes in the 2D view. (as of Version 4.5.0) |
| 5 | Toggle facilities | Show/hide facilities |
| 6 | View all | The 2D view of the Material Zone Editor switches to a bird's eye view and shows the entire project from above. |
| 7 | View selection | The selected element is zoomed in on. |
| 8 | Add a new information label | Creates an information label that can be freely defined and then stored in the project. (as of version 4.5.0) More information here. |
| 9 | Open Box Demand Dialog | Opens a pop-up window in which the box count and the box matrix of the selected containers can be adjusted. (as of version 4.5.0) More information here. |
| 10 | disregard Obstacles | When the “disregard Obstacles” function is activated, obstacles such as factory pillars or blocking areas are ignored when material is provisioned. (before version 4.5.0) |
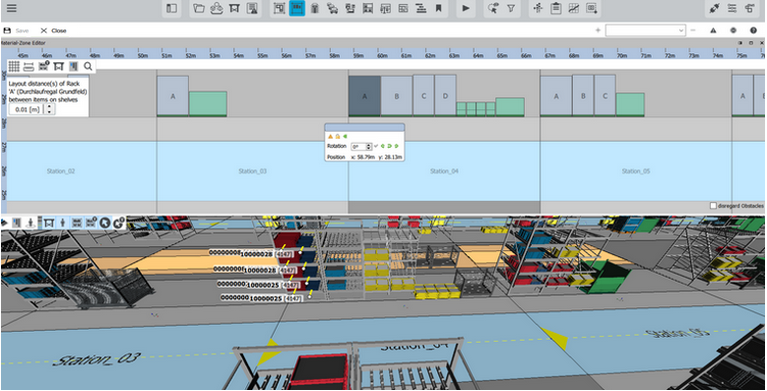
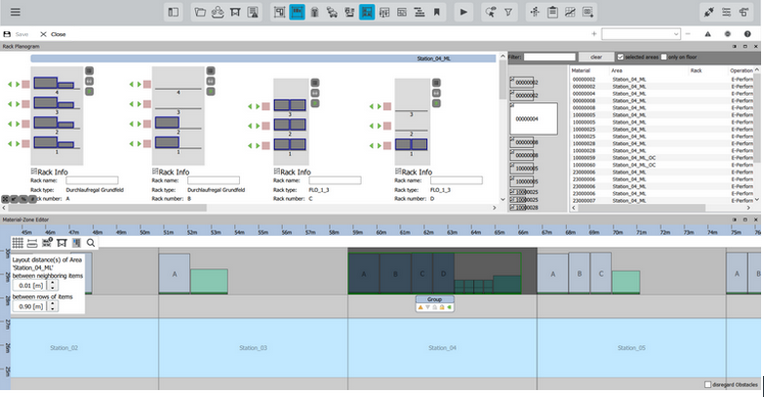
If a material area is selected, there is a possibility to change the distance between the shelves and boxes or between rows of shelves/boxes.
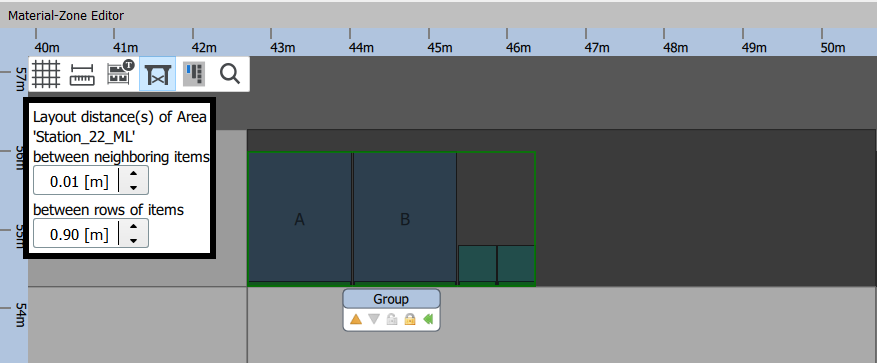
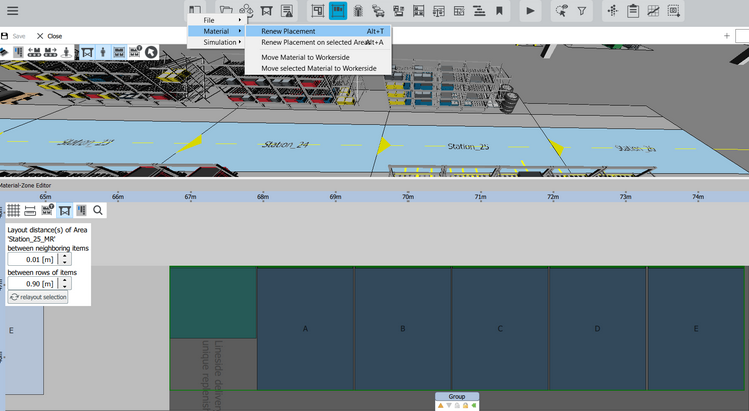
Please note: If the spacing has been changed in the material zone editor, a “Renew Placement” must be carried out under "File Menu" > "Material".
Navigation
as of version 4.4.7:
- Left mouse button: A single click on an element selects it. By double-clicking on an area or object, ipolog 4 Workspace zooms in closer.
- Right mouse button: Holding down the right mouse button allows you to move the image section.
- Scroll wheel: Scrolling with the scroll wheel zooms in or out. A single click on a selected element deselects it again. Hold down the scroll wheel to move the image section. Hold down Alt and draw a rectangle by moving the mouse while holding down the scroll wheel to zoom in. Hold down Shift and draw a rectangle by moving the mouse while holding down the scroll wheel to select the elements in this area together.
before version 4.4.7:
- Left mouse button: A single click on an element selects it. Hold down CTRL and click on several elements to select them. Double-click on an area or object to zoom in on ipolog 4 Workspace.
- Right mouse button: Holding down the right mouse button allows you to move the image section.
- Scroll wheel: Scrolling with the scroll wheel zooms in or out. Hold down Alt and draw a rectangle by moving the mouse while holding down the scroll wheel to zoom in. Hold down Shift and draw a rectangle by moving the mouse while holding down the scroll wheel to select the elements in this area together.
The navigation in the "Measure mode".
| You add measurement points when you click with the left mouse button. On the left side the current distance of the measurement, as well as the coordinates of the mouse position are displayed. | |
| When you have taken all the measurements. Then click with the right mouse button to calculate the "distance and to fix the measurements in place. Now you can move the objects while the dimensions are still displayed. (The values do not change when you zoom in or out). |
Special functions for boxes and racks
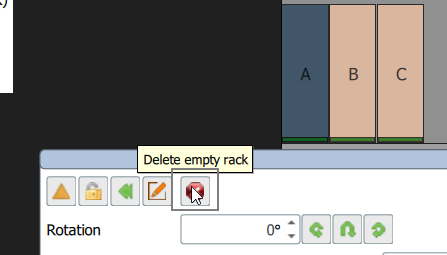
- If there are empty racks on the material area, they can be deleted via the Material Zone Editor:
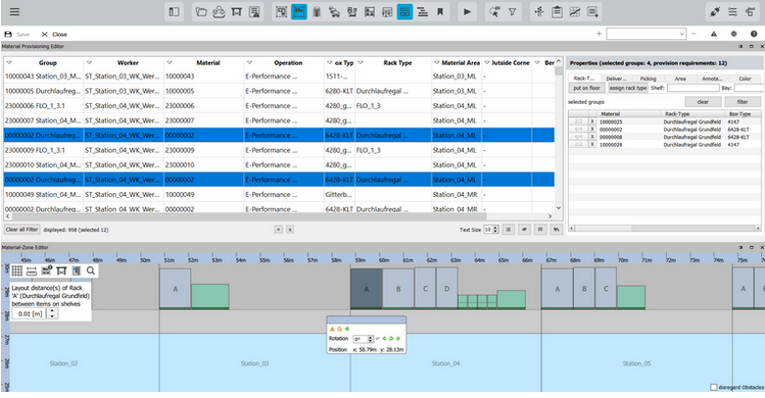
- Already used racks can be modified directly on the selected material area via the Rack Instance Editor
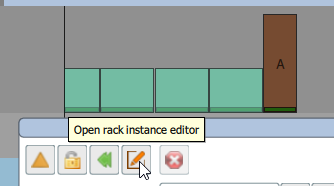
Only the selected rack is modified, all other racks keep the old properties. As soon as a rack has been modified, it is marked as "modified rack instance" and displayed in orange-grey (see screenshot above). In addition, for the material in modified racks, also in Material Provisioning Editor there is a hint that a modified rack is used.

More details about the Material Provisioning Editor can be found here.
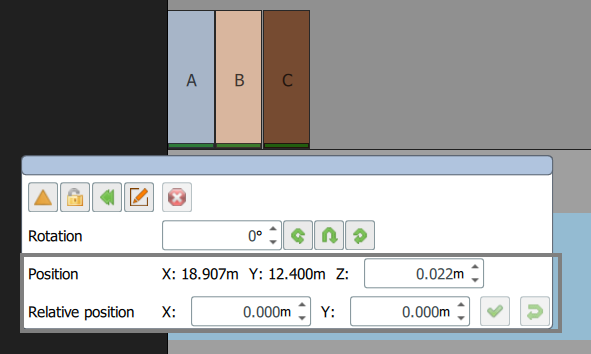
- The positions of the racks can be moved in the Material Zone Editor using their X, Y and Z coordinates:
Special functions for box groups
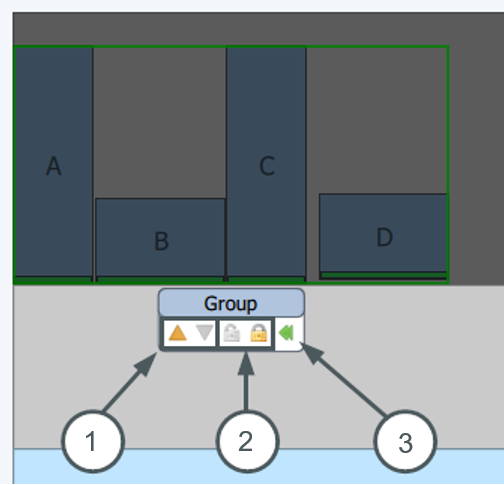
If you click on a material surface, the entire boxes and racks are selected as a group.
-
The yellow triangle ("Move to oc area") makes it possible to move the group to the outside corner area. The other yellow triangle ("Move to material area") is grayed out. This command can be executed only when the group is on the Outside Corner Area. 2.
-
the lock ("Fix") offers the possibility to fix the group, so it cannot be moved anymore. Here the open lock ("Unfix") is grayed out. The functions "Fix" and "Unfix" work alternately. 3.
-
The green arrow ("Layout on this area") makes it possible to automatically place the group at the defined edge.
Special functions for individual boxes and groups
- the yellow triangle makes it possible to move the box or shelf automatically to the Outside Corner Area.
The lock fixes the box, which can now no longer be moved.
The green arrow automatically moves the box to the selected edge.
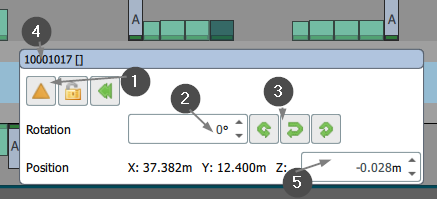
-
If the box or the shelf is to be positioned at a certain angle, the desired angle can be set here.
-
The green arrows make it possible to always rotate the boxes by 90 degrees.
-
here the box or shelf type or if available the shelf name is displayed
-
The z coordinate file can be stored for boxes on the floor. The z-coordinate can't be changed for boxes in racks.
Linked functions
3D view
If a box or shelf is moved in the Material Zone Editor, it will also move in the 3D view. If a box or shelf is selected in the Material Zone Editor, the selection is also visible in the 3D view.
A rack or box can be selected via the 3D view and the view in the Material Zone Editor will then be centered on this area or the selected rack / box will be visually highlighted.
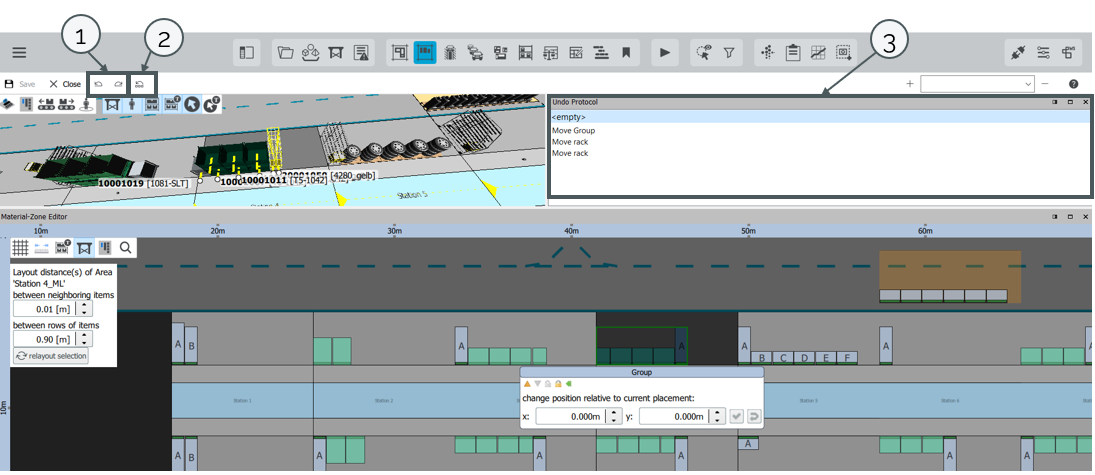
Undo/Redo function
The Undo/Redo function can be used to undo or redo operations (1). Another possibility to undo operations is via the key combination alt+z. To restore an operation, use alt+y. In the Undo Protocol (3) all changes before saving are listed. The protocol opens with a click on the button (2). The changes can also be called up via the protocol.
If the function is not possible, information is provided via a notification. This is the case with "Move to OC", for example.
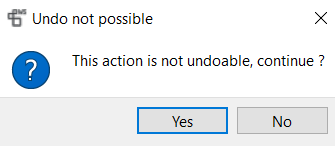
Note: The Undo Protocol is deleted after the execution of an action that cannot be undone.
Material Provisioning Editor
When a box or shelf is clicked in the Material Zone Editor, the components are selected in the Material Provisioning Editor. The Material Provisioning Editor now offers the possibility to select or change the shelf and box type. For more information, see Material Provisioning Editor.
Rack Planogram
If you select a material area or a rack in the Material Zone Editor and switch to the Rack Planogram, you have the option here to place boxes in racks or to arrange the boxes in racks differently. For more information, see Move containers - Rack planogram.
Measure Mode
Click on “Enter Measure Mode” in the function bar to open the measurement function of the Material Zone Editor.
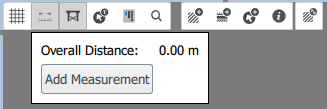
Select "Add measurement" to start measuring:

You can set a measuring point with a simple left-click. If you set several measuring points, the distance between the points is displayed. Cancel the measurement with a simple right-click. This allows you to carry out several independent measurements with several measuring points.
Click on the “-” symbol in the top right-hand corner of the information window to delete the last measurement point set. During the measurement, you can use the scroll wheel to move the camera closer and further away.
Add information label
With the introduction of version 4.5.0, it is now possible to create information labels in the Material-Zone Editor. To do this, select “Add a new information label”:
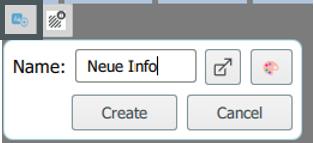
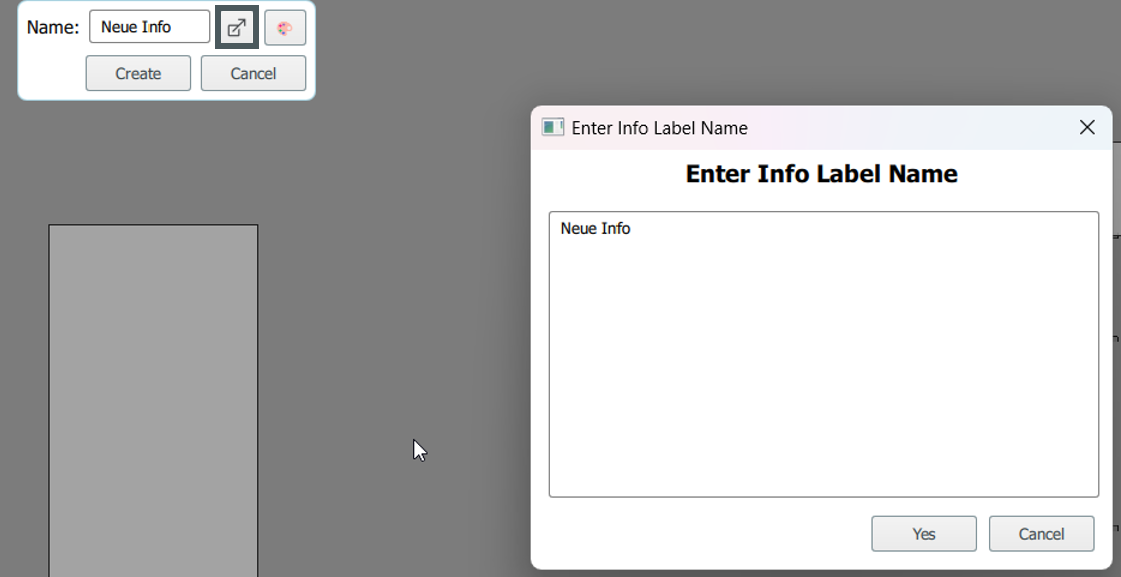
Here you can define the text and a color for the information label. “Create” creates the label so that you can place it in the layout editor. “Cancel” cancels the creation of the label.
Click on “Expand name field” to open a separate window in which you can adjust the text: